
The 29-minute Breakout: Why monthly vulnerability scanning no longer works
TLDR: We attended Cyber Security 2026: Kritisk infrastruktur in Stockholm, and the reality check was simple: “breakout time” has hit a record low of 29 …

Gwendal Le Coguic

This is a guest blog post from Detectify Crowdsource hacker, Gwendal Le Coguic. This is a tutorial on how to bypass Cloudflare WAF with the origin server IP address.
Cloudflare is a widely used web app firewall (WAF) provider. But what if you could bypass all these protections in a second making the defense useless? This article is a tutorial on bypassing Cloudflare WAF with the origin server IP address.
Note that what is following is probably relevant for any kind of Web Application Firewall.
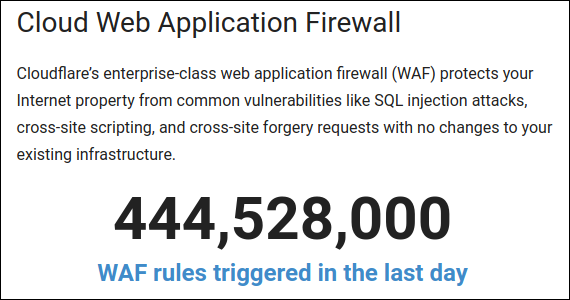
With more than 16M Internet properties, Cloudflare is now one of the most popular web application firewalls (WAF). A year ago Cloudflare released a fast DNS resolver, which became the proverbial cherry on top of their service offering. Working as a reverse proxy, the WAF does not only offer a protection against DDOS but can also trigger an alert when it detects an attack. For paid subscriptions, users have the option to turn on protection against common vulnerabilities such as SQLi, XSS and CSRF, yet this must be manually enabled. This option is not available for free accounts.
While the WAF is pretty good at blocking basic payloads, many bypasses around Cloudflare WAF already exist and new ones pop up everyday so it’s important to keep poking at testing the security of Cloudflare. At the exact moment I am writing this article:

As a hacker bug bounty hunter, it’s obvious that it could be very interesting to get rid of the firewall. For that, you basically have 3 options:
In this in this article, I’m going to focus on the last option and how to achieve it based on tips grabbed here and there.
Reminder: Cloudflare is a tool that has to be set by humans, usually developers or system administrators. Cloudflare is not responsible of the misconfiguration that could lead to successful attacks performed using the methods described below.
The idea is to start your normal recon process and grab as many IP addresses as you can (host, nslookup, whois, ranges…), then check which of those servers have a web server enabled (netcat, nmap, masscan). Once you have a list of web server IP, the next step is to check if the protected domain is configured on one of them as a virtual host. If not, you’ll get the default server page or the default website configured. If yes then you found the entry point! Using Burp:
This shows the subdomain I’m looking for but with the wrong IP address:

This shows the wrong subdomain, but with a good IP address:
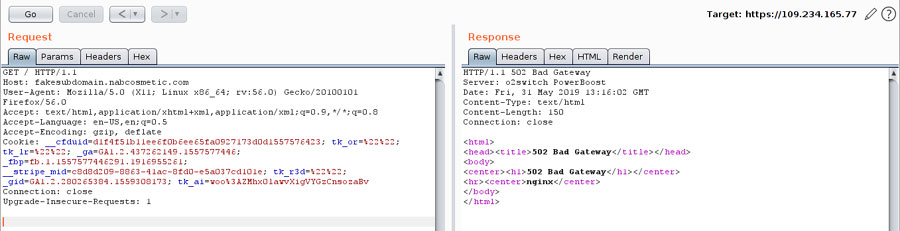
This shows the subdomain I’m looking for, but with a good IP address – perfect!

Some tools available to automate this process:
https://pentest-tools.com/information-gathering/find-virtual-hosts
https://github.com/jobertabma/virtual-host-discovery
https://github.com/gwen001/vhost-brute
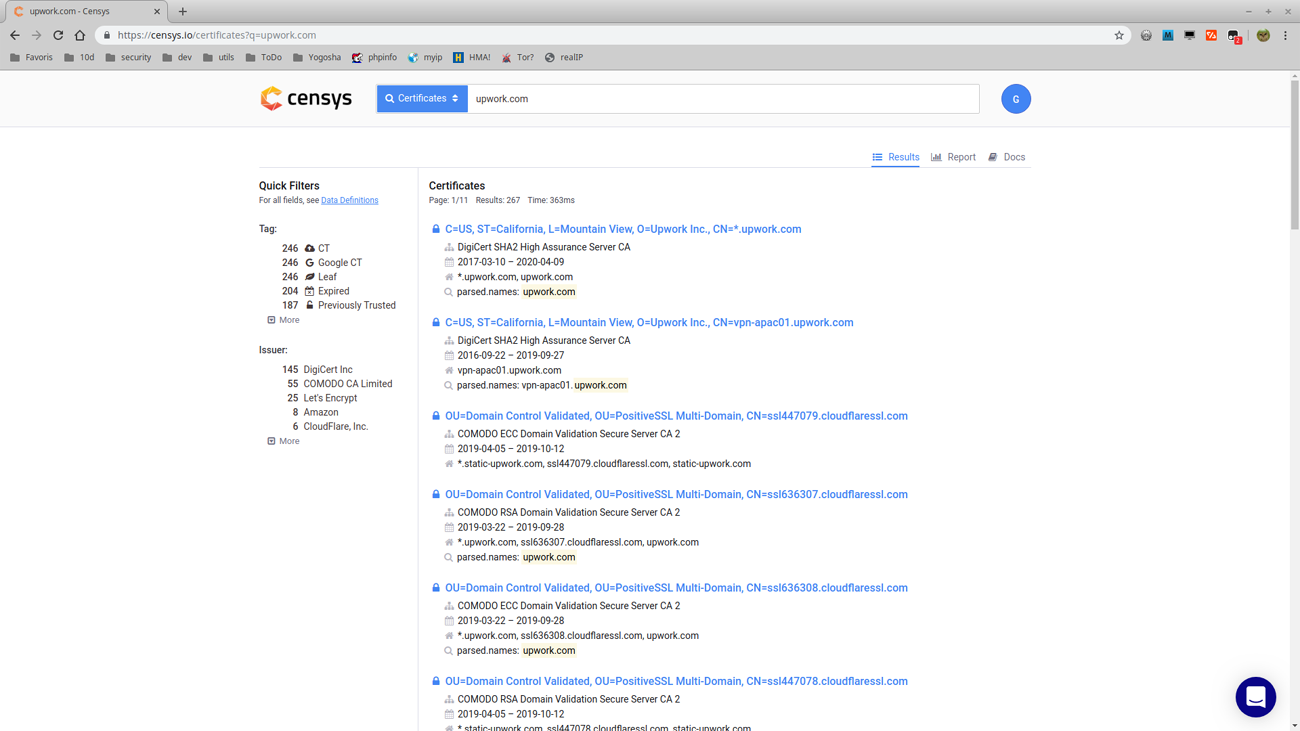
If your target has a SSL certificate (and it should!), then it’s registered in the Censys database (I strongly recommend to subscribe). Choose “Certificates” in the select input, provide the domain of your target, then hit <enter>.
You should see a list of certificates that fit to your target:
Click on every result to display the details and, in the “Explore” menu at the very right, choose “IPv4 Hosts”:
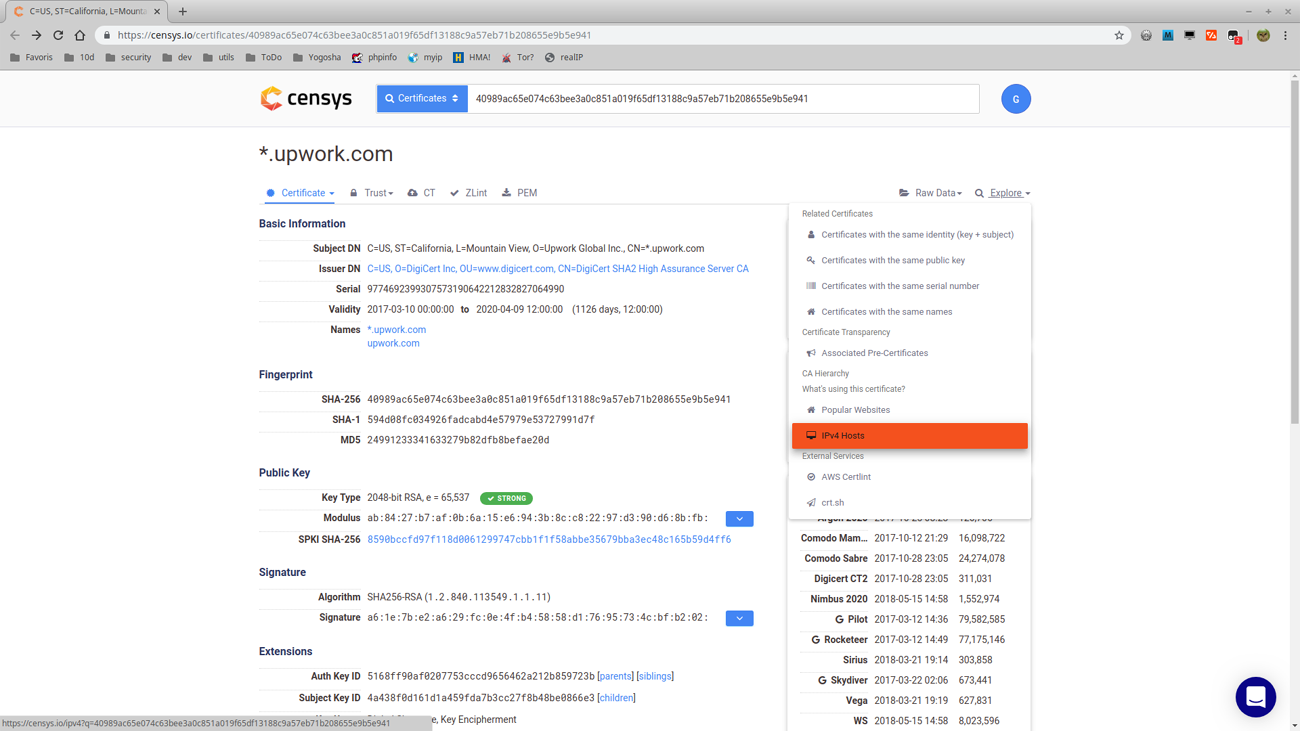
You should be able to see the IP addresses of the servers that use the certificate:

From here, grab all IP you can and, back to the previous chapter, try to access your target through all of them.
The next step is to retrieve the headers in the mails issued by your target: Subscribe the newsletter, create an account, use the function “forgotten password”, order something… in a nutshell do whatever you can to get an email from the website you’re testing (note that Burp Collaborator can be used).
Once you get an email, check the source, and especially the headers. Record all IPs you can find there, as well as subdomains, that could possibly belong to a hosting service. And again, try to access your target through all of them.
The value of header Return-Path worked pretty well for me:

Test using Curl:

Another trick is to send a mail from your own mailbox to a non-existing email address @yourtarget.com. If the delivery fails, you should receive back a notification. Thanks to @_3P1C.
This well known tool in WordPress, the XML-RPC (Remote Procedure Call), allows an administrator to manage his/her blog remotely using XML requests. A pingback is the response of a ping. A ping is performed when a site A links to a site B, then the site B notifies the site A that it is aware of the mention. This is the pingback.
You can easily check if it’s enable by calling https://www.target.com/xmlrpc.php. You should get the following:XML-RPC server accepts POST requests only.
According to WordPress XML-RPC Pingback API, the functions takes 2 parameters sourceUri and targetUri. Here is how it looks like in Burp Suite:

Credit to @Rivitheadz.
If you’re not able to find the origin IP using the previous methods or if the website was not protected when you first started your hunt but finally became protected, remember that sometimes your best friend is your target itself and it can give you the information you are looking for.
Basically what you need is that the web server of your target performs a request to your server/collaborator. Using another type of issue could also be a good idea: SSRF, XXE, XSS or whatever you already found, to inject a payload that contains your server/collaborator address and check the logs. If you got any hit then check the virtual host again.
Even the simplest vulnerabilities like Open Redirect or HTML/CSS injection can be useful if it’s interpreted by the application web server.
For now we have seen how to find and check IP addresses manually, fortunately we have great developers in our community. Below are some tools that are supposed to do the job for you, and these could save your precious time. You can include them in your recon process as soon as you detect a Cloudflare protection.
Note, that none of these methods are 100% reliable as all targets are different and what will work for one, may not work for another. My advice: try them all.
HatCloud: crimeflare, ipinfo.io
CrimeFlare: crimeflare, ipinfo.io
bypass-firewalls-by-DNS-history: securitytrails, crimeflare
CloudFail: dnsdumpster, crimeflare, subdomain brute force
CloudFlair: censys key required
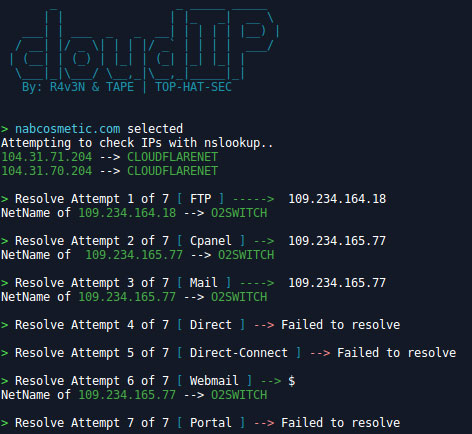
CloudIP: nslookup some subdomains (ftp, cpanel, mail, direct, direct-connect, webmail, portal)

As you probably understood, the most important thing is to grab as many IP addresses as you can – no matter how, no matter where. DNS servers are of course the main focus of attention, especially their history which will be forever available in the Internet memory. Below are some great sources you can use to find your Graal.
Netcraft: https://toolbar.netcraft.com/site_report?url=
dns-trails: https://securitytrails.com/dns-trails
DNSQueries: https://www.dnsqueries.com/en/domain_check.php
DNSdumpster: https://dnsdumpster.com/
Shodan: https://www.shodan.io/search?query=
Past cases reports on Hackerone:
https://hackerone.com/reports/255978
https://hackerone.com/reports/360825
https://hackerone.com/reports/315838
As we often say in the security industry: a chain is as strong as its weakest link. No matter how much time you’ve spent to configure Cloudflare, if it can be bypassed and if your web app can be directly reached through the server IP, then all protections offered by Cloudflare are also bypassed. They become totally useless as you’re not protected anymore.
There are probably many other ways to perform this bypassing task, and now that you get the idea, feel free to send me your tips in the comments or via twitter. I will be more than happy to add them onto my blog.
I personally never reported such things but according to Soroush Dalili, being able to get around Cloudflare is something considered as a security misconfiguration so it deserves an alert. Bounty plzzzzzzzzzzzzzzzzzzzz!
Further reading:
So is it safe to assume you’re convinced that having a WAF alone cannot prevent attackers from breaching your web apps?
Since WAFs cannot process context, it’s not able to stop attacks like Server-Side Request Forgery and security misconfigurations. Pairing WAFs together with scanners that can test with actual payloads and simulated hacker attacks is one way to harden your application security.
For example, Detectify’s test bed is based on HTTP request testing and using real-life payloads crowdsourced by ethical hackers like Gwendal Le Coguic. Users can get verified results that activate the prioritization of security fixes in a timely manner, and reduces time lost to rolling back products.
You don’t need to be a hacker to work with payloads and Detectify makes it easy. All you need to do is verify your domain to get started on your website security. Give it a try with a free 2-week trial of Detectify by signing up today.
TLDR: We attended Cyber Security 2026: Kritisk infrastruktur in Stockholm, and the reality check was simple: “breakout time” has hit a record low of 29 …

Detectify vs Acunetix is a common comparison for AppSec teams evaluating Dynamic Application Security Testing (DAST) tools. This article provides a direct comparison between Detectify …

